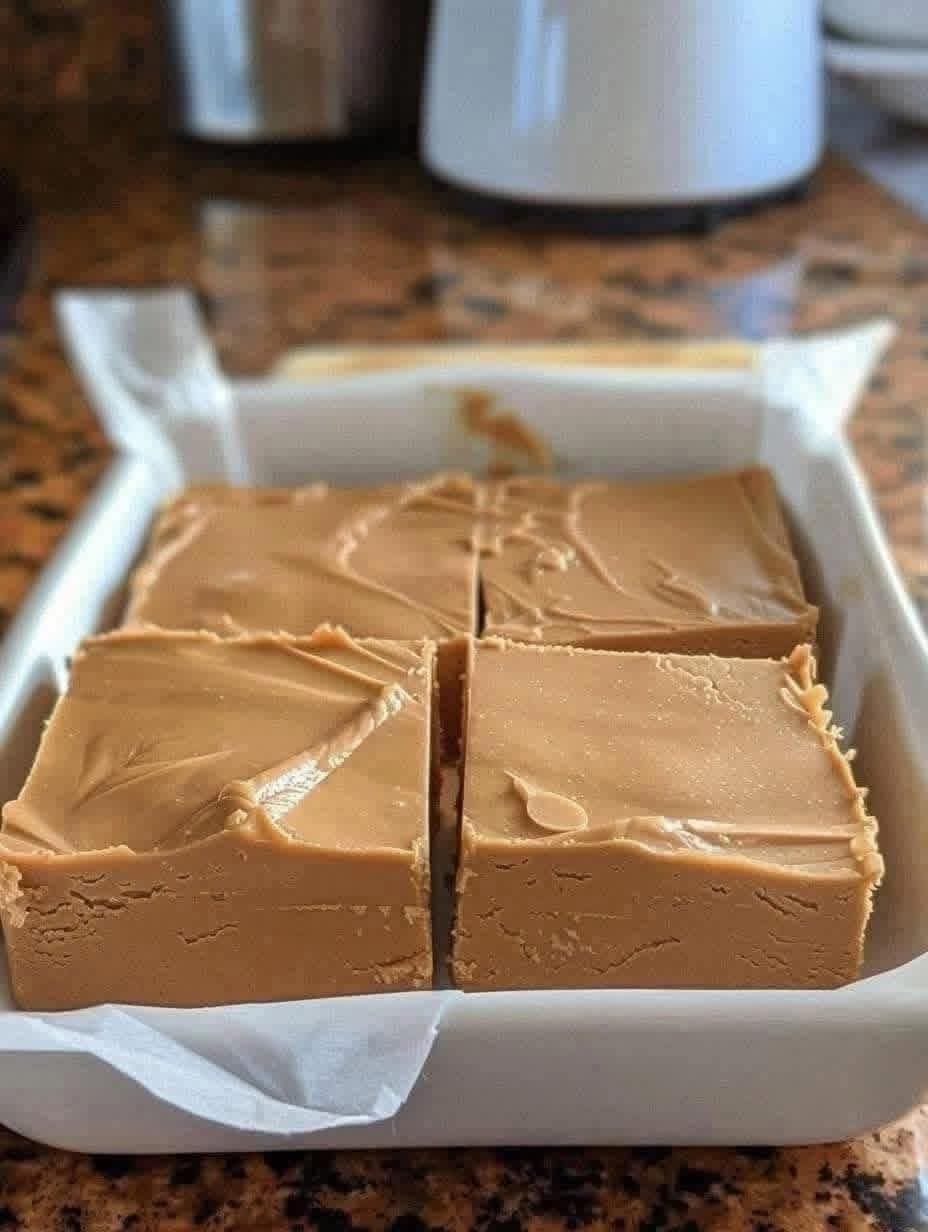
Three-Batch Family-Size Recipe
Rich • Creamy • Sweet • Peanut-Buttery • Homemade
❤️ Introduction
There are desserts that are fancy, and then there are desserts that simply feel like home.
This old-fashioned peanut butter fudge is one of those recipes. Made with just a handful of pantry ingredients, it has that wonderful combination of creamy peanut butter flavor and sweet, melt-in-your-mouth fudge texture.
And because one batch is never enough when everyone starts asking for another piece, this recipe makes 3 batches at once!
Whether you’re preparing it for Christmas, a family gathering, a bake sale, a holiday cookie tray, or simply because you love peanut butter, this is the kind of homemade treat that disappears quickly.
If you love old-fashioned recipes like this, please leave a ❤️, say “YUM,” or tell me where you’re from so I can keep sharing more! Thank you!
🥜 Ingredients — 3 Batches
Your original recipe makes 1 batch:
- 1 cup granulated sugar
- ½ cup milk
- 1 cup peanut butter
- 1 teaspoon vanilla extract
For 3 batches, you’ll need:
Main Ingredients
- 3 cups granulated sugar
- 1½ cups milk
- 3 cups peanut butter
- 3 teaspoons vanilla extract — equal to 1 tablespoon
Optional Additions
These aren’t necessary for the classic recipe, but you can add:
- ½ teaspoon salt, especially if using unsalted peanut butter
- ½ cup chopped roasted peanuts for extra crunch
- A small pinch of flaky salt on top
- ½ cup chocolate chips for a peanut-butter-and-chocolate version
For the most traditional flavor, keep it simple with the four original ingredients.
🍳 Equipment
You’ll want:
- 1 large, heavy-bottomed saucepan
- Wooden spoon or sturdy heatproof spatula
- Candy thermometer, if available
- 1 large baking pan or several smaller pans
- Parchment paper or lightly buttered foil
- Measuring cups and spoons
- Sharp knife for cutting
Because this is a triple batch, use a generously sized saucepan so the mixture has plenty of room to bubble.
👩🍳 Method
Step 1 — Prepare Your Pan
Line your baking pan or pans with parchment paper, leaving a little overhang on the sides.
Alternatively, lightly butter the pans.
Having the pan ready before you start cooking is important because once the fudge reaches the right stage, you need to work fairly quickly.
Step 2 — Combine the Sugar and Milk
Place the 3 cups of sugar and 1½ cups of milk into a heavy-bottomed saucepan.
Set the pan over medium heat.
Stir gently until the sugar begins dissolving into the milk.
Continue heating until the mixture comes to a full boil.
Step 3 — Cook the Sugar Mixture
Once the mixture reaches a steady boil, continue cooking until it reaches the soft-ball stage, approximately 234–240°F (112–116°C) depending on the recipe and conditions.
A candy thermometer is the easiest way to judge this stage. Traditional fudge recipes commonly use this temperature range for the soft-ball stage.
No candy thermometer?
Use the traditional cold-water test.
Drop a small amount of the hot syrup into a glass of very cold water.
When the syrup cools enough to gather into a soft, pliable ball between your fingers, it is ready.
Be extremely careful—the syrup is very hot.
🥜 Step 4 — Add the Peanut Butter
Remove the saucepan from the heat.
Immediately add:
3 cups peanut butter
Stir until the peanut butter is completely melted into the hot sugar mixture.
The mixture should become thick, smooth, glossy, and wonderfully peanut-buttery.
🌼 Step 5 — Add the Vanilla
Add:
3 teaspoons vanilla extract
Stir thoroughly.
The vanilla gives the fudge a deeper, warmer flavor and balances the sweetness.
🥄 Step 6 — Beat the Fudge
This is the part that gives homemade fudge its beautiful texture.
Beat the mixture vigorously with a wooden spoon or sturdy spatula until it begins to thicken and lose some of its glossy appearance.
Traditional fudge-making involves beating the cooked mixture as it cools to encourage the fine sugar crystals that give fudge its characteristic creamy texture.
Don’t overbeat it, though. Once it becomes thick but still spreadable, you’re ready for the next step.
🍯 Step 7 — Pour Into the Pan
Immediately transfer the fudge into your prepared pan.
Spread it evenly with a spatula.
If you’re adding chopped peanuts, sprinkle them over the top while the fudge is still warm and gently press them into the surface.
For a beautiful finishing touch, add just a tiny pinch of flaky salt.
❄️ Step 8 — Let It Set
Allow the fudge to cool completely until firm.
Depending on the temperature of your kitchen and the depth of the fudge, this can take a couple of hours or longer.
Don’t rush this step.
The fudge needs time to finish setting and develop its proper texture.
🔪 Step 9 — Cut Into Squares
Once completely firm, lift the fudge from the pan using the parchment-paper overhang.
Place it on a cutting board.
Use a sharp knife to cut it into small squares.
For party-size pieces, cut approximately 1-inch squares.
For generous pieces, cut them slightly larger.
✨ FORMATION & TEXTURE
The magic of this recipe happens when the sugar and milk are cooked to the proper stage.
The mixture first becomes a hot sugar syrup. As it cooks, water evaporates and the syrup becomes more concentrated.
Once the peanut butter and vanilla are incorporated and the mixture cools while being beaten, tiny sugar crystals form.
Those crystals are what help transform the syrup into the familiar smooth, creamy fudge texture rather than a simple caramel-like candy.
That’s why temperature and timing matter so much.
💡 Helpful Tips for Perfect Fudge
Use a heavy saucepan
A heavy-bottomed pan distributes heat more evenly and helps prevent scorching.
Have everything ready
Measure the peanut butter and vanilla before you start cooking.
Don’t walk away
Hot sugar syrup can change temperature quickly.
Watch the temperature
If the mixture doesn’t reach the proper stage, the fudge may remain too soft. If it’s cooked too far, it can become dry or crumbly.
Don’t cut it too soon
Let the fudge completely set before slicing.
Peanut butter choice
Creamy peanut butter gives you a smooth fudge. Crunchy peanut butter gives you little bits of peanuts throughout.
🥜 DELICIOUS VARIATIONS
Chocolate Peanut Butter Fudge
Swirl melted chocolate over the top before the fudge sets.
Crunchy Peanut Fudge
Use crunchy peanut butter and sprinkle chopped roasted peanuts over the top.
Chocolate Swirl
Add spoonfuls of melted chocolate to the warm fudge and gently swirl with a knife.
Salted Peanut Butter Fudge
Finish with a very small amount of flaky sea salt.
Holiday Fudge
Cut the fudge into small squares and arrange it on a Christmas dessert tray alongside cookies and candies.
🎁 SERVING IDEAS
This fudge is perfect with:
☕ Coffee
🥛 Cold milk
🍵 Tea
🍨 Vanilla ice cream
🍪 Cookies
🍫 Chocolate desserts
🎄 Holiday dessert trays
You can also package individual squares in small candy cups and place them in a decorative tin for a homemade gift.
📖 A LITTLE HISTORY
Fudge became popular in American home kitchens during the late 19th and early 20th centuries. Peanut butter fudge became a particularly beloved variation because peanut butter was inexpensive, flavorful, filling, and easy to combine with traditional sugar-based fudge.
Old-fashioned versions often relied on simple ingredients and careful cooking rather than modern shortcuts. Recipes using sugar, milk, peanut butter, and vanilla remain popular because they capture that classic homemade candy-shop flavor. Traditional peanut-butter fudge recipes frequently use the same basic technique of cooking a sugar-and-dairy mixture to the soft-ball stage before incorporating peanut butter and vanilla.
❤️ FOR THE FUDGE LOVERS
If peanut butter is your weakness, this is dangerous—in the best possible way!
It’s creamy.
It’s rich.
It’s sweet.
It’s nutty.
And the best part?
You don’t need a long ingredient list to make something everyone will love.
This is the kind of recipe that gets passed around at family gatherings with someone inevitably asking:
“Who made this?”
And then comes the second question:
“Is there any more?”
🏡 CONCLUSION
Three batches means plenty to share—but don’t be surprised if you want to hide a few pieces for yourself!
This simple combination of sugar, milk, peanut butter, and vanilla creates a classic homemade candy with a rich peanut-butter flavor and wonderfully creamy texture.
Make it for the holidays, make it for your family, make it for friends—or make it simply because you’re craving something sweet.
And if you love recipes like this, please don’t just scroll past. ❤️
Say “YUM,” leave a ❤️, or comment “YES” so I know you want more old-fashioned recipes like this one!
Thank you for supporting my recipes and keeping these homemade favorites alive! 🥜❤️
🥜 OLD-FASHIONED PEANUT BUTTER FUDGE
Simple ingredients. Homemade flavor. A whole lot of love.