Introduction
There are few desserts as universally beloved as a perfectly baked chocolate cake. When that cake combines the deep, rich flavors of Hershey’s cocoa with a luscious cream cheese filling, it transforms from a simple treat into an extraordinary culinary experience. My recent adventure baking this Hershey’s Chocolate Cake with Cream Cheese Filling proved to be more than just another baking project—it was a journey into the heart of what makes chocolate desserts so magical.
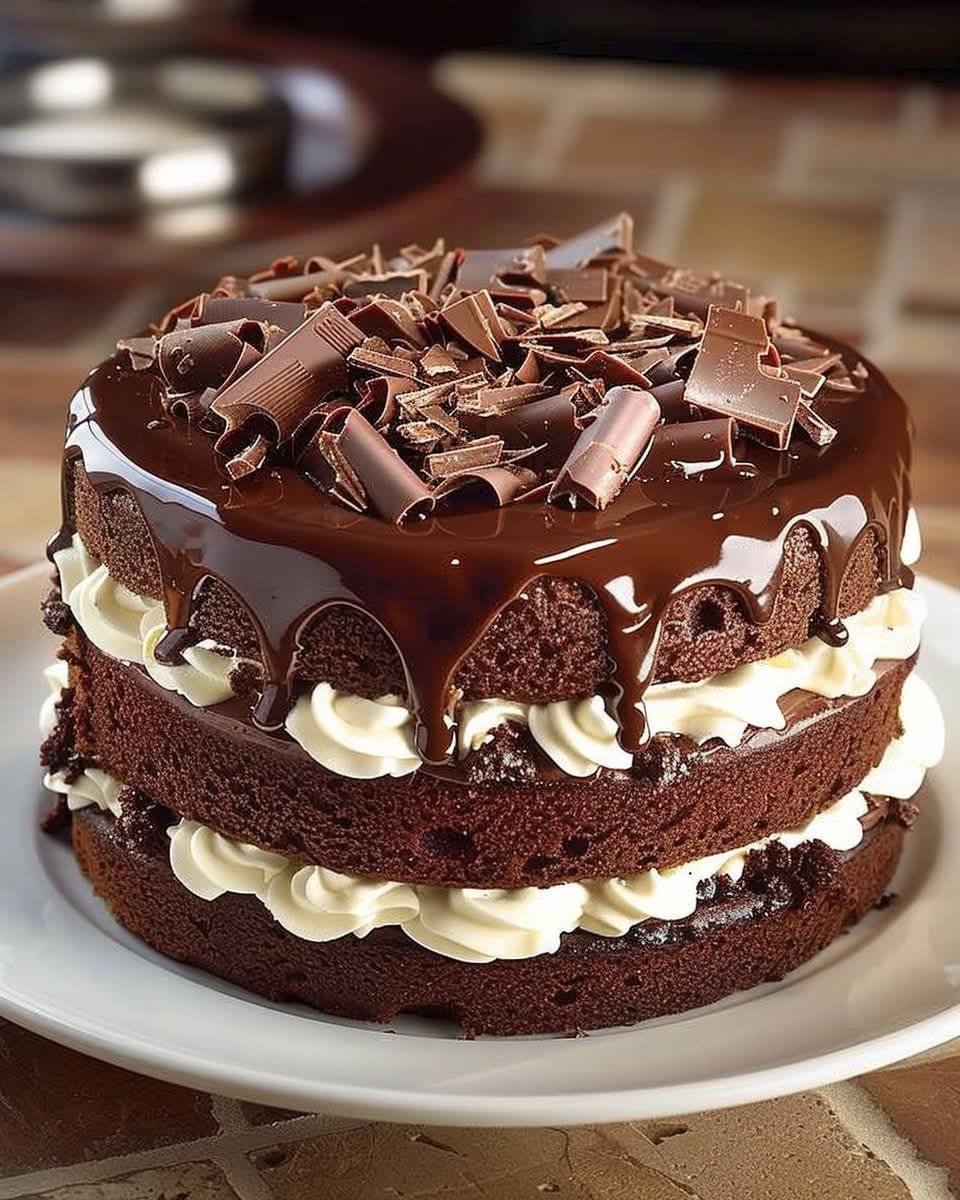
This recipe stands out for its perfect balance of flavors and textures. The chocolate cake layers are moist and tender, with an intense cocoa flavor that only quality Hershey’s cocoa powder can provide. The cream cheese filling adds a delightful tanginess that cuts through the richness of the chocolate, creating a harmonious contrast that keeps every bite interesting. What makes this cake particularly special is its versatility—it’s equally suited for casual family gatherings as it is for special occasions, and the addition of the cream cheese filling elevates it beyond your standard chocolate cake.
As I discovered through my baking experience, this recipe is remarkably forgiving for home bakers while still producing professional-quality results. The ingredients are simple and likely already in your pantry, but when combined with care and attention, they create something truly extraordinary. Whether you’re an experienced baker looking for a new showstopper or a beginner ready to tackle your first layered cake, this Hershey’s Chocolate Cake with Cream Cheese Filling promises delicious rewards.
The Baking Experience: From Ingredients to Indulgence
Ingredients
For the Chocolate Cake:
- 2 cups all-purpose flour
- 1 3/4 cups granulated sugar
- 3/4 cup unsweetened cocoa powder (Hershey’s recommended)
- 1 1/2 teaspoons baking powder
- 1 1/2 teaspoons baking soda
- 1 teaspoon salt
- 2 large eggs
- 1 cup whole milk
- 1/2 cup vegetable oil
- 2 teaspoons vanilla extract
- 1 cup boiling water
For the Cream Cheese Filling:
- 8 ounces cream cheese, softened
- 1/4 cup granulated sugar
- 1 large egg
- 1/2 teaspoon vanilla extract
Step-by-Step Instructions
Preparing the Cake Batter:
- Preheat your oven to 350°F (175°C). Grease and flour two 9-inch round cake pans, lining the bottoms with parchment paper for guaranteed easy release.
- In a large mixing bowl, sift together the flour, sugar, cocoa powder, baking powder, baking soda, and salt. This crucial step ensures your cake will have a light, uniform texture without any lumps.
- Add the eggs, milk, oil, and vanilla to the dry ingredients. Using an electric mixer on medium speed, beat for about 2 minutes until well combined. The batter will be thick and glossy at this stage.
- Carefully stir in the boiling water. The batter will become thin—this is normal and contributes to the cake’s remarkable moistness.
Baking the Layers:
- Divide the batter equally between the prepared pans. The hot water in the batter helps create steam during baking, resulting in an exceptionally tender crumb.
- Bake for 30-35 minutes, or until a toothpick inserted in the center comes out clean. The aroma filling your kitchen will be irresistible.
- Allow the cakes to cool in their pans for 10 minutes before transferring to wire racks to cool completely. This patience prevents crumbling and ensures perfect layers.
Creating the Cream Cheese Filling:
- While the cakes cool, prepare the filling by beating the softened cream cheese until smooth.
- Gradually add the sugar, followed by the egg and vanilla, mixing until creamy and well incorporated. The filling should be smooth but not too runny.
Assembling the Masterpiece:
- Once the cake layers are completely cool, place one layer on your serving plate. Spread the cream cheese filling evenly over the top, leaving about a 1/2-inch border around the edge to prevent squeezing out when layered.
- Gently place the second cake layer on top. For best results, refrigerate the cake for at least 30 minutes before frosting to set the filling.
Frosting Options:
While delicious as is, you might choose to frost your creation with:
- A classic chocolate ganache
- Whipped chocolate buttercream
- A simple dusting of powdered sugar
Conclusion: A Dessert Worth Celebrating
My experience baking this Hershey’s Chocolate Cake with Cream Cheese Filling confirmed what I suspected—this is no ordinary chocolate cake. The addition of the cream cheese layer transforms it into something truly special, adding complexity to what might otherwise be a straightforward chocolate dessert. The cake itself is remarkably moist and chocolatey, with the boiling water technique ensuring a tender crumb that stays fresh for days.
What makes this recipe particularly valuable is its flexibility. The cream cheese filling can be adapted with additions like orange zest for brightness or a swirl of raspberry preserves for fruitiness. The cake layers work equally well with different frostings or even served unfrosted as a sophisticated snack cake.
For anyone who loves baking, this cake represents the perfect balance of approachability and impressive results. The ingredients are simple, the techniques straightforward, but the final product tastes like it came from a professional bakery. Whether you’re baking for a special occasion or simply to satisfy a chocolate craving, this Hershey’s Chocolate Cake with Cream Cheese Filling promises to deliver satisfaction in every slice.
The true test of any recipe is whether you’d make it again—and in this case, I can confidently say this cake has earned a permanent place in my baking repertoire. Its perfect combination of rich chocolate and tangy cream cheese creates a dessert that’s greater than the sum of its parts, proving that sometimes the most satisfying baking projects are those that take classic flavors and present them in new, delightful ways.