Introduction
If you love the delicious combination of chocolate, creamy sweetness, and crunchy malted milk balls, this easy dessert is about to become one of your favorite treats! These Malted Milk Ball Chocolate Crunch Bars are packed with sweet, chocolatey flavor and a wonderful crunchy texture in every bite.
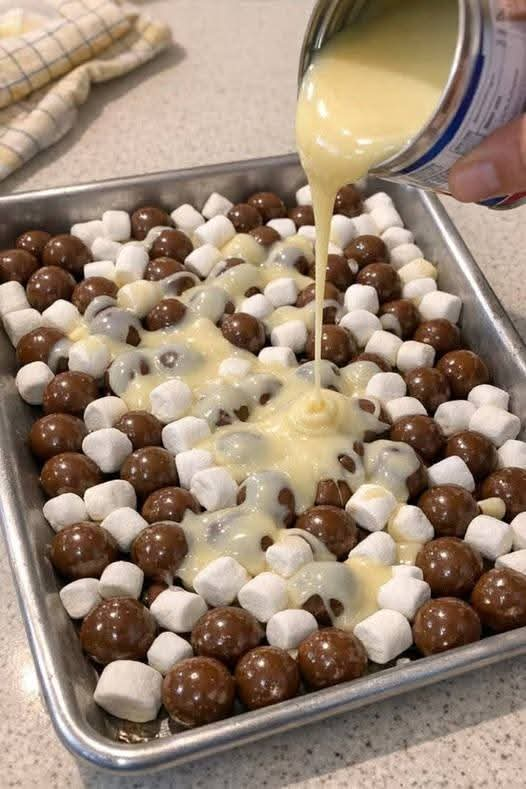
The best part? You pour whole, uncrushed malted milk balls into a baking pan and combine them with four simple ingredients to create a dessert that looks impressive but requires very little effort. There is no complicated decorating, no fancy equipment, and no need to spend hours in the kitchen.
These sweet treats are perfect for family gatherings, birthday parties, Christmas celebrations, church potlucks, bake sales, or simply enjoying at home with a cup of coffee. Cut them into squares, arrange them on a pretty plate, and watch everyone reach for seconds!
Ingredients
Makes approximately 16–20 bars · Preparation: 15 minutes · Chilling: 2–3 hours

1. Malted milk balls
- 2 cups whole chocolate-covered malted milk balls, such as Whoppers
- Keep them whole for delightful crunchy bites.

2. Chocolate chips
– 2 cups semisweet chocolate chips
These provide a rich chocolate base that holds the bars together.

3. Butter
– 4 tablespoons unsalted butter
Butter helps make the chocolate mixture smooth and rich.

4. Sweetened condensed milk
– 1 can (14 ounces)
Adds creamy sweetness and helps create a soft, fudgy texture.

5. Vanilla extract
– 1 teaspoon
Enhances the chocolate flavor and gives the dessert a lovely aroma.
Instructions
Step 1: Prepare the baking pan
Line a 9-by-13-inch baking pan with parchment paper, leaving a little extra paper over the edges. This will make it easier to lift out the finished dessert and cut it into neat squares.
Lightly grease the parchment paper if desired.
Step 2: Arrange the malted milk balls
Pour the whole malted milk balls evenly into the prepared pan.
Spread them into a single layer so every square will contain plenty of crunchy candy. Resist the temptation to crush them because their whole shape creates a lovely contrast with the smooth chocolate mixture.
Step 3: Melt the chocolate and butter
Place the chocolate chips and butter in a microwave-safe bowl.
Heat in 20–30-second intervals, stirring between each interval until the chocolate is almost completely melted. Continue stirring until smooth.
You can also melt the ingredients in a heatproof bowl over a saucepan of gently simmering water. Keep water away from the chocolate to prevent it from seizing.
Step 4: Add the condensed milk
Stir the sweetened condensed milk into the melted chocolate mixture until combined.
If necessary, warm the mixture very gently to help it become smooth. Remove it from the heat and stir in the vanilla extract.
The result should be a thick, glossy chocolate mixture.
Step 5: Pour over the candy
Carefully pour the chocolate mixture over the whole malted milk balls.
Use a spatula to spread it evenly, gently filling the spaces between the candies. Make sure the chocolate reaches the corners of the pan.
Some malted milk balls may remain partially visible on top, giving the dessert a beautiful, homemade appearance.
Step 6: Chill until firm
Place the pan in the refrigerator for approximately 2–3 hours, or until the chocolate mixture is firm enough to cut.
For the cleanest slices, allow the bars to become completely set before removing them from the pan.
Step 7: Slice and serve
Lift the chilled dessert out using the parchment paper. Place it on a cutting board and cut into 16–20 squares with a sharp knife.
For neater cuts, warm the knife slightly and wipe it clean between slices.
Arrange the bars on a serving platter and enjoy!
Methods of Preparation
The stovetop method: Melt the chocolate and butter over low heat, stirring continuously. Remove from the heat before mixing in the condensed milk and vanilla.
The microwave method: Heat the chocolate and butter in short intervals, stirring frequently. This is convenient for busy days and helps prevent scorching.
The chilling method: Refrigeration allows the chocolate mixture to firm up around the candies, making the dessert easy to slice and serve.
The serving method: Serve the bars chilled for a firm, crunchy texture, or let them stand at room temperature briefly for a softer chocolate bite. Avoid leaving them in a warm place for extended periods.
A Little History of Malted Milk Candy
Malted milk became popular in the late nineteenth century, when malted grain and milk powders were developed as convenient, nourishing ingredients. Their distinctive toasted, creamy flavor later found its way into milkshakes, chocolate drinks, and confectionery.
Chocolate-covered malted milk balls became a beloved candy because they combine a crisp, airy malted center with a sweet chocolate coating. They are especially popular in movie theaters, candy shops, and family snack cupboards.
This recipe brings that familiar candy-shop flavor into a simple homemade dessert. The chocolate base holds the candies together while allowing their crunchy centers to remain a delightful surprise.
Formation and Texture
The magic of this dessert comes from the contrast between its ingredients.
- The chocolate layer: Rich, smooth, and fudgy, providing the main structure of the bars.
- The malted milk balls: Crisp, sweet, and crunchy, adding texture to every bite.
- The condensed milk: Creates a creamy sweetness that balances the slightly toasted malt flavor.
- The butter: Adds richness and helps the chocolate mixture melt smoothly.
- The vanilla: Brings all the flavors together.
As the mixture chills, the chocolate firms around the candies and creates bars that are easy to hold. Cutting through the dessert reveals little pockets of crunchy candy surrounded by soft chocolate.
Helpful Tips for Perfect Results
- Use good-quality chocolate. Semisweet chocolate helps balance the sweetness of the condensed milk and candy.
- Do not overheat the chocolate. Excessive heat can make it thick or grainy.
- Keep the malted milk balls whole. This gives the bars their signature crunch.
- Line the pan with parchment paper. It makes removing the dessert much easier.
- Chill thoroughly. Cutting too early may cause the bars to fall apart.
- Use a sharp knife. A slightly warmed knife produces cleaner edges.
- Store properly. Keep the bars in an airtight container in the refrigerator for up to one week for best quality.
Delicious Variations

Peanut Butter Malted Bars
Add ½ cup creamy peanut butter to the chocolate mixture for a nutty flavor that pairs beautifully with malted milk candy.

White Chocolate Crunch Bars
Replace some or all of the semisweet chocolate with white chocolate. The result will be sweeter and creamier.

Nutty Chocolate Bars
Sprinkle chopped toasted pecans or almonds over the top before chilling for extra crunch.

Caramel Chocolate Bars
Drizzle a little caramel sauce over the set bars just before serving for an extra-special dessert.
When to Serve These Sweet Treats
These bars are wonderful for almost any occasion:
- Family movie nights: A delicious alternative to serving candy straight from the bag.
- Birthday parties: Cut them into small squares for an easy dessert platter.
- Holiday gatherings: Arrange them with cookies, brownies, and fudge.
- Church potlucks: Bring a batch of bite-sized treats that guests can easily pick up.
- Homemade gifts: Pack the chilled bars in a food-safe gift box and keep them cool during transport.
- Everyday cravings: Enjoy one small square when you want something sweet after dinner.
Conclusion
These Malted Milk Ball Chocolate Crunch Bars prove that a handful of everyday ingredients can become something truly special. The smooth chocolate, creamy sweetness, and crunchy malted milk candies create a combination that is both comforting and delicious.
They are easy enough for beginner bakers, convenient for busy families, and attractive enough to share at celebrations. Best of all, you can prepare them ahead of time and keep them chilled until you are ready to serve.
Make a batch for your family, place them on the table, and see how quickly they disappear. Just be sure to save a few for yourself!
For the Lovers of Chocolate and Homemade Desserts ❤️
If you love chocolate fudge, crunchy candy, and easy homemade sweets, this recipe is worth keeping in your dessert collection. You can change the chocolate, add nuts, or experiment with caramel to create your own family favorite.
A little chocolate, a little crunch, and lots of love make every bite memorable.
And if you love simple recipes that bring everyone running to the kitchen, leave a simple “Yum!” in the comments. 🍫😋
Final Method: Make-Ahead and Storage
- Make ahead: Prepare the bars the evening before serving and refrigerate overnight.
- Refrigerate: Store in an airtight container for up to one week for best quality.
- Freeze: Freeze individual portions in a freezer-safe container, separated with parchment paper, for up to two months for best quality. Thaw in the refrigerator.
- Serve: Let the bars stand at room temperature for about 5–10 minutes before eating if you prefer a softer chocolate texture.
Recipe reminder: This is a developed recipe inspired by the caption, since the original post did not provide exact ingredient quantities. The finished texture may vary depending on the chocolate and malted milk balls you use.