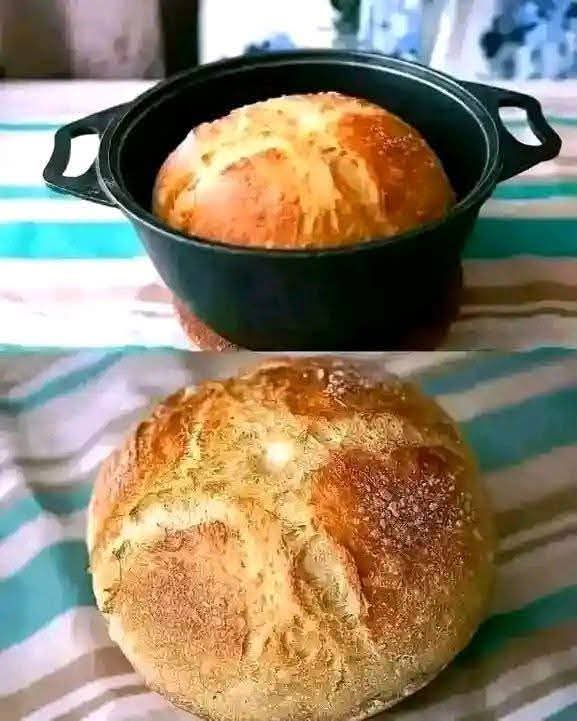

This homemade artisan bread has a beautifully golden, crispy crust and a soft, airy interior. Baked in a covered cast-iron Dutch oven, it develops a rustic appearance with a crunchy exterior similar to the bread shown in your picture.
The recipe uses simple pantry ingredients: flour, water, yeast, and salt. The secret is allowing the dough enough time to rise and baking it in a preheated Dutch oven, which traps steam and helps the bread develop its crust.
Recipe Information
- Preparation time: 15–20 minutes
- Rising time: 2–3 hours
- Baking time: 40–45 minutes
- Total time: Approximately 3–4 hours
- Servings: 1 large loaf
- Difficulty: Easy to moderate
Ingredients

For the bread dough
- 500 g bread flour or all-purpose flour
- 350 ml lukewarm water
- 7 g instant yeast
- 10 g salt
- 1 teaspoon sugar, optional
- 1 tablespoon olive oil, optional
- A little extra flour for shaping
Instructions and Baking Method

Step 1: Mix the ingredients
Combine the flour, yeast, and sugar in a large bowl. Add the lukewarm water and mix until a rough dough forms. Add the salt and mix again until evenly distributed.
The dough should feel soft and slightly sticky. Avoid adding too much extra flour, because this can make the finished bread dense.

Step 2: Knead the dough
Knead by hand for approximately 8–10 minutes, or use a stand mixer with a dough hook for 5–7 minutes.
Continue until the dough becomes smoother and elastic. If it feels very sticky, lightly wet your hands rather than adding large amounts of flour.

Step 3: Let the dough rise
Place the dough in a lightly oiled bowl and cover it with a clean towel or plastic wrap.
Leave it in a warm place for approximately 1–2 hours, or until it has roughly doubled in size. The exact time depends on the room temperature and yeast activity.

Step 4: Shape the loaf
Transfer the dough to a lightly floured surface. Gently fold the edges toward the center and turn it over.
Shape it into a tight round ball, creating surface tension without tearing the dough. Place it seam-side down on parchment paper, cover it, and let it rest for another 30–45 minutes.

Step 5: Preheat the Dutch oven
About 30 minutes before baking, preheat your oven to 230°C (450°F), with the empty Dutch oven and its lid inside if the manufacturer’s instructions allow it.
Always use oven mitts when handling the hot pot. Check that your cookware, handles, and lid are rated for this temperature.

Step 6: Score the dough
Carefully remove the hot Dutch oven. Transfer the loaf using the parchment paper, keeping your hands away from the hot sides.
Make one shallow slash across the top with a sharp bread lame or knife. This allows the loaf to expand as it bakes.

Step 7: Bake the bread
Cover the Dutch oven with its lid and bake for 25–30 minutes. The trapped steam helps the loaf rise and develops a crisp crust.
Remove the lid carefully and continue baking for another 10–15 minutes, until the crust is deep golden brown.

Step 8: Cool before slicing
Transfer the bread to a wire rack and allow it to cool for at least 45–60 minutes.
Cooling lets the inside finish setting. Cutting the loaf while it is very hot can compress the crumb and make it seem gummy.
Tips for Perfect Artisan Bread
- Use the correct water temperature: Lukewarm water helps activate the yeast without damaging it.
- Do not rush the rise: The dough should expand noticeably before shaping.
- Keep the dough slightly sticky: Too much flour can produce a dry, heavy loaf.
- Preheat the Dutch oven: This encourages oven spring and crust development.
- Bake uncovered at the end: Removing the lid allows moisture to escape and the crust to brown.
- Let the loaf cool: This helps create a better texture when sliced.
Serving Suggestions
Serve this bread warm or at room temperature with butter, olive oil, cheese, soup, or a fresh salad. It is also excellent for sandwiches, breakfast toast, and dipping into Moroccan tagines or other sauces.
For storage, keep the completely cooled loaf in a paper bag or bread box for up to two days. Freeze sliced bread in an airtight freezer bag for longer storage, then toast or reheat the slices when needed.
Conclusion
This Dutch oven artisan bread is a wonderful homemade recipe with a crisp golden crust and a soft interior. With a few basic ingredients, sufficient rising time, and the right baking temperature, you can make a rustic loaf that looks beautiful and tastes delicious.
The most important secret: bake the bread covered first to trap steam, then uncover it to achieve that rich, crunchy crust. 🍞