Introduction
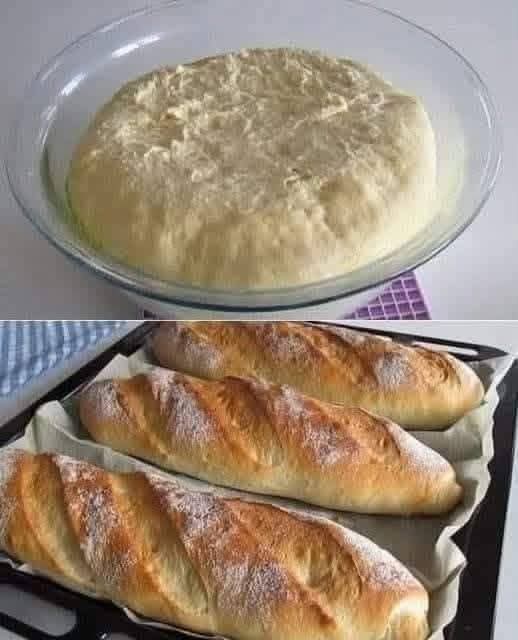
After making this bread at home, you may find yourself wondering why you ever needed to buy a loaf from the store. This recipe uses simple everyday ingredients—flour, yeast, warm water, olive oil, and salt—to create a wonderfully fresh loaf with a tender crumb and golden crust.
The dough is easy to prepare, requires basic kneading, and becomes beautifully airy as it rises. Fresh from the oven, the aroma fills the kitchen and makes even a simple breakfast or dinner feel special.
Ingredients
- 4 ¾ cups (570 g) plain/all-purpose flour
- 1 ⅓ cups (320 ml) warm water
- 1 tablespoon (10 g) dry yeast
- 1 teaspoon salt
- 4 tablespoons (60 ml) olive oil
- A little extra flour for shaping
- A little extra olive oil for greasing, if needed
Instructions
1. Prepare the yeast
Place the warm water in a large mixing bowl. The water should feel comfortably warm rather than hot. Add the dry yeast and stir gently.
Let it stand for about 5–10 minutes. If your yeast is active, it should begin to look slightly foamy.
2. Make the dough
Add the olive oil and salt. Gradually add the flour, mixing as you go.
At first, the dough will look rough and sticky. Continue mixing until the flour is incorporated and a soft dough begins to form.
Avoid adding too much extra flour. A slightly soft dough generally produces a lighter loaf.
3. Knead
Transfer the dough to a lightly floured surface.
Knead for approximately 8–10 minutes, folding and pressing the dough repeatedly. As you knead, the dough should become smoother, softer, and more elastic.
If it is extremely sticky, add flour a tablespoon at a time. If it feels unusually dry, add a tiny splash of water.
4. First rise
Place the kneaded dough in a lightly oiled bowl.
Cover it with a clean kitchen towel or plastic wrap and leave it in a warm, draft-free place for about 1–1½ hours, or until approximately doubled in size.
The exact rising time depends on the warmth of your kitchen.
5. Shape the bread
Once risen, gently press the dough down to release excess air.
Transfer it to your work surface and shape it into a round or oval loaf. Place it on a baking sheet lined with parchment paper, or place it into a lightly greased loaf pan if you prefer a sandwich-style loaf.
Cover again and allow it to rest for about 25–40 minutes.
6. Prepare for baking
Preheat your oven to 200°C (400°F).
For a traditional bakery-style appearance, make one or two shallow cuts across the top of the loaf using a sharp knife.
You can lightly brush the surface with olive oil for additional color and flavor.
7. Bake
Place the bread in the preheated oven.
Bake for approximately 30–40 minutes, or until the loaf is golden brown and sounds hollow when tapped on the bottom.
If the top begins browning too quickly, loosely cover it with foil during the final part of baking.
8. Cool
Remove the bread from the oven and transfer it to a wire rack.
Allow it to cool for at least 20–30 minutes before slicing. Although the smell may make it difficult to wait, cooling allows the interior to finish setting properly.
Method
The method behind this bread is simple: yeast creates fermentation, flour provides the structure, water hydrates the flour, olive oil contributes tenderness and flavor, and salt balances the dough.
Kneading develops gluten, which gives the dough enough strength to trap the gases produced by the yeast. During the first rise, the dough expands and becomes airy. Shaping redistributes the dough before its final rise, while baking transforms the soft dough into a fragrant loaf with a firm crust.
Formation of the Bread
The formation begins when flour comes into contact with water. The flour hydrates and its proteins begin forming gluten. Kneading strengthens this gluten network.
Meanwhile, the yeast consumes available sugars in the dough and produces carbon dioxide. The gluten network holds those tiny gas bubbles, causing the dough to expand.
During baking, the heat causes the trapped gases to expand further. The structure sets, moisture turns to steam, and the outer surface develops its characteristic golden-brown crust.
History
Bread is one of the oldest prepared foods in human history. Ancient communities discovered that mixtures of grain and water could be transformed into nourishing flatbreads, while the discovery and development of fermentation eventually led to lighter, risen loaves.
Over centuries, bread-making developed differently across cultures and regions. European-style yeast breads, Mediterranean breads made with olive oil, rustic country loaves, and countless regional varieties all demonstrate how a handful of basic ingredients can create very different results.
This homemade loaf follows that same timeless principle: simple ingredients, careful fermentation, and good baking.
Serving Ideas
This bread is delicious while still slightly warm. Serve it with:
- Butter and honey
- Olive oil and herbs
- Cheese
- Eggs
- Soup or stew
- Roasted vegetables
- Grilled chicken
- Sandwich fillings
- Jam or fruit preserves
It can also be sliced and toasted the following day.
Tips for Bread Lovers
Use warm, not hot, water. Very hot water can damage yeast.
Don’t overload the dough with flour. Adding too much flour can make the finished bread heavy and dry.
Give the dough time to rise. A proper rise contributes significantly to the texture.
Knead thoroughly. The dough should become noticeably smoother and more elastic.
Let the loaf cool before cutting. This helps prevent a gummy interior.
For extra crust: Place a heatproof pan in the oven while preheating and carefully add a little hot water to it when the bread goes in. The resulting steam can help create a crispier crust.
Conclusion
Homemade bread doesn’t have to be complicated. With just flour, yeast, water, olive oil, and salt, you can create a fresh loaf with a soft, airy center and a beautiful golden crust.
The greatest reward is not only the bread itself but the experience of making it. Once you become comfortable with the dough, you can experiment with herbs, seeds, garlic, whole-grain flour, or different shapes.
And the next time you smell freshly baked bread coming from your own oven, you may understand why so many bread lovers prefer making it themselves.