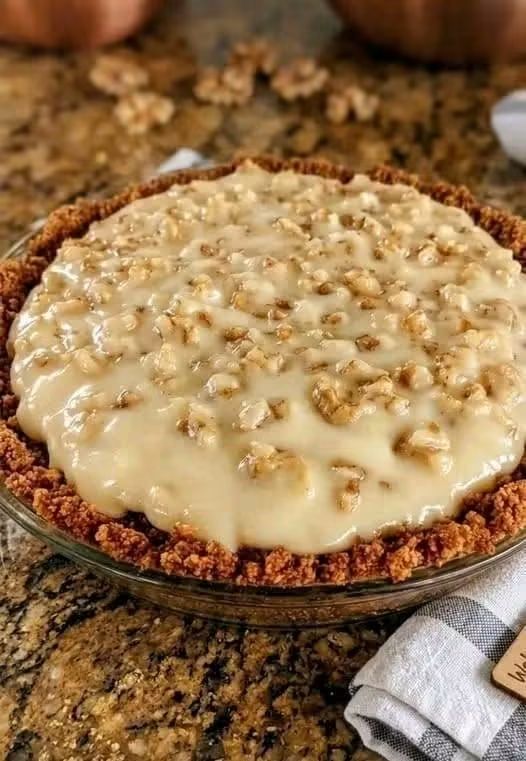
I cannot believe I finally found this recipe! 🥹
My grandma would make these little bites for holiday parties when I was a girl, and I would sneak as many as I could without being discovered. I thought I had forgotten the exact taste, but one bite brought everything rushing back—the buttery aroma, the crispy edges, the savory cheesy center, and that unmistakable homemade flavor.
Some recipes are more than food. They are memories.
They remind us of crowded kitchens, holiday music playing in the background, family talking around the table, and Grandma somehow making everything taste better. These little party bites were always one of the first things to disappear from her serving tray.
I finally made them again, and my heart is so happy. ❤️ They taste just like I remember!
If you love old-fashioned family recipes, this one is definitely worth saving.
I sent it to whoever sent me “Hi.” ❤️
👇 Recipe below — save it before you scroll away!
🧀 GRANDMA’S CLASSIC HOLIDAY PARTY BITES
✨ Crispy, Cheesy, Savory & Buttery
Prep Time: 20 minutes
Chill Time: 30 minutes
Bake Time: 15–20 minutes
Total Time: About 1 hour
Servings: 30–36 bites
🛒 INGREDIENTS
For the bites:
- 2 cups all-purpose flour
- 1 teaspoon baking powder
- ½ teaspoon salt
- ½ teaspoon garlic powder
- ¼ teaspoon black pepper
- ½ cup unsalted butter, softened
- 1 large egg
- 1½ cups shredded sharp cheddar cheese
- ½ cup finely grated Parmesan cheese
- 2 tablespoons finely chopped fresh parsley
- ½ teaspoon paprika
- 2–3 tablespoons milk, only if needed
Optional additions:
- ¼ teaspoon onion powder
- A pinch of cayenne pepper
- 2 tablespoons finely chopped green onions
- ¼ cup finely chopped cooked bacon
- A little extra Parmesan for sprinkling
👩🍳 INSTRUCTIONS
1. Prepare the oven
Preheat your oven to 375°F (190°C).
Line a large baking sheet with parchment paper or lightly grease it.
This helps the little bites bake evenly and prevents the bottoms from sticking.
2. Mix the dry ingredients
In a medium bowl, whisk together:
- Flour
- Baking powder
- Salt
- Garlic powder
- Black pepper
- Paprika
Set the bowl aside.
This simple step distributes the seasonings throughout the flour so every bite gets plenty of flavor.
3. Cream the butter
In a large mixing bowl, beat the softened butter until smooth and creamy.
Add the egg and continue mixing until everything is well combined.
The mixture should look smooth and slightly fluffy.
4. Add the cheese
Stir in the shredded cheddar and Parmesan.
Add the chopped parsley and any optional ingredients you are using.
This is where the magic starts.
The sharp cheddar gives the bites their rich, cheesy flavor, while Parmesan adds a salty, savory depth.
5. Form the dough
Gradually add the dry ingredients to the butter-and-cheese mixture.
Mix just until a soft dough forms.
If the dough seems too dry or crumbly, add milk one tablespoon at a time until it comes together.
Don’t overmix.
You want the finished bites to be tender rather than tough.
👐 FORMATION METHOD
Now comes the fun part!
Take approximately 1 tablespoon of dough and gently roll it between your palms.
Form it into a small ball.
Place each ball onto the prepared baking sheet, leaving about 1½ inches between them.
For a slightly flatter, crispier appetizer, gently press each ball with your fingertips.
For a more rustic Grandma-style appearance, simply leave them rounded.
Repeat until all the dough has been used.
❄️ GRANDMA’S LITTLE TRICK
For the best texture, place the prepared baking sheet in the refrigerator for about 30 minutes before baking.
Chilling the dough helps the bites hold their shape and gives them a wonderful tender-but-crispy texture.
This is especially helpful if your kitchen is warm or the butter became very soft while mixing.
🔥 BAKING METHOD
Bake in the preheated oven for approximately 15–20 minutes, or until the edges are lightly golden.
Keep an eye on them during the final few minutes.
You want the bottoms and edges beautifully golden without over-browning the cheese.
Remove the tray from the oven and let the bites rest for 5 minutes before transferring them to a serving platter.
They will continue to firm up slightly as they cool.
✨ EXTRA-CRISPY METHOD
If you love crispy edges, make the bites slightly smaller and flatten them a little before baking.
You can also sprinkle a tiny amount of Parmesan over the tops before they go into the oven.
The cheese melts, bubbles, and develops those irresistible golden edges.
🧀 SERVING IDEAS
These little bites are wonderful served warm or at room temperature.
Put them on a holiday platter alongside:
- Crackers
- Olives
- Pickles
- Fresh vegetables
- Grapes
- Cheese
- Dips
- Charcuterie
- Cranberry sauce
They are perfect for:
🎄 Christmas parties
🦃 Thanksgiving gatherings
🎉 Birthday parties
🥂 Family celebrations
🏡 Potlucks
🎊 New Year’s Eve
❤️ Sunday gatherings
📖 A LITTLE HISTORY
Recipes like these belong to a wonderful tradition of homemade party food.
Before every gathering had trays of store-bought appetizers, families often relied on simple pantry ingredients—flour, butter, eggs, cheese, and seasonings—to create something special.
Grandmothers had a wonderful talent for turning inexpensive ingredients into food that people remembered for decades.
The exact recipe often changed from family to family.
One grandmother added extra cheese.
Another used cayenne.
Someone else added bacon or herbs.
And somehow, every version became “Grandma’s recipe.”
That’s what makes recipes like this so special.
They’re not just instructions written on paper.
They’re pieces of family history.
❤️ WHY PEOPLE LOVE THESE
Crispy outside
The edges become lightly golden and wonderfully crisp.
Cheesy inside
Cheddar and Parmesan create a rich, savory center.
Easy ingredients
No complicated ingredients are required.
Make-ahead friendly
The dough can be prepared ahead of time and chilled before baking.
Perfect party food
They’re small, easy to pick up, and almost impossible to resist.
Nostalgic
One bite can take you straight back to Grandma’s kitchen.
🧊 STORAGE
Allow the baked bites to cool completely.
Store them in an airtight container at room temperature for about 2 days, or refrigerate them for longer storage.
To bring back some of their crispness, warm them briefly in a 350°F (175°C) oven.
Avoid microwaving if you want to keep the outside crisp.
❄️ MAKE-AHEAD METHOD
You can also prepare the dough ahead of time.
Form the dough into balls, place them on a parchment-lined tray, and freeze until firm.
Transfer the frozen dough balls to a freezer-safe container or bag.
When you’re ready to bake, place them on a baking sheet and bake from frozen, adding a few extra minutes to the baking time.
This makes them perfect for unexpected guests and holiday entertaining.
👵 THE REAL SECRET
The real secret isn’t just the butter.
It isn’t the cheese.
It isn’t even the perfect baking time.
The secret is making them with love.
Grandma probably wasn’t thinking about exact measurements or presentation.
She was simply making something delicious for the people she loved.
And years later, those flavors become memories.
That’s why recreating an old family recipe can feel like opening a little time capsule.
❤️ FOR THE LOVERS OF OLD-FASHIONED RECIPES
If you love recipes that remind you of childhood, Sunday dinners, holiday parties, family kitchens, and Grandma’s cooking, this one deserves a place in your recipe box.
There is something incredibly comforting about pulling a warm tray of homemade bites from the oven and realizing that the smell is exactly how you remember it.
Maybe you’ll make these for your own family.
Maybe you’ll serve them at Christmas.
Maybe you’ll put them on a party table and watch them disappear.
Or maybe you’ll simply make them for yourself and enjoy a little taste of the past.
Whatever you do, save this recipe. ❤️
🥰 FINAL THOUGHT
Some recipes feed your stomach.
Others feed your heart.
These are the kind of little bites that make people gather around the kitchen, reach for “just one more,” and ask:
“Who made these?”
And when you tell them it’s Grandma’s recipe, somehow they taste even better.
✨ Make them. Share them. Save the recipe. And most importantly, make some memories of your own.
If Grandma’s recipes have a special place in your heart, leave a ❤️ below.
And yes…
I sent it to whoever sent me “Hi.” 😊❤️