Perfect No-Knead Bread Recipe
Introduction
There is something magical about homemade bread. The aroma that fills the kitchen, the golden crust fresh from the oven, and the soft, fluffy interior make bread one of the world’s most beloved foods. This Perfect No-Knead Bread Recipe is designed for beginners and experienced bakers alike. With only a few simple ingredients and minimal effort, you can create bakery-quality bread without kneading the dough.
This recipe produces a loaf with a beautifully crisp crust, airy crumb, and rich flavor. Whether enjoyed at breakfast, lunch, or dinner, this bread is a timeless favorite.
History of No-Knead Bread
Bread has been a staple food for over 10,000 years. Ancient civilizations in Egypt, Mesopotamia, and Greece developed early forms of yeast-leavened bread. Traditionally, bread dough required extensive kneading to develop gluten, the protein structure responsible for bread’s texture.
The modern no-knead method became famous because it allowed home bakers to achieve artisan-style bread with far less work. By allowing a longer fermentation period, gluten develops naturally, creating excellent texture and flavor without intensive kneading.
Today, no-knead bread is loved worldwide for its simplicity and outstanding results.
Ingredients
Dough
- 1 tablespoon sugar
- 1 teaspoon dry yeast
- 250 ml (1 cup) lukewarm water
- 450 g (about 3½ cups) all-purpose flour
- 1 teaspoon salt
Optional Toppings
- Sesame seeds
- Poppy seeds
- Oats
- Garlic butter
- Fresh herbs
Equipment Needed
- Large mixing bowl
- Wooden spoon
- Baking tray
- Kitchen towel
- Measuring cups and spoons
- Oven
Preparation Method
Step 1: Activate the Yeast
- Pour the lukewarm water into a large bowl.
- Add sugar and yeast.
- Stir gently.
- Allow the mixture to sit for 5–10 minutes.
- The yeast should become foamy and active.
Step 2: Prepare the Dough
- Add flour and salt to the bowl.
- Mix using a spoon until all ingredients combine.
- The dough will appear slightly sticky.
- Do not knead.
This sticky texture helps create a soft interior after baking.
Step 3: First Rise
- Cover the bowl with a clean kitchen towel.
- Place in a warm area.
- Let rise for 1–2 hours.
- The dough should double in size.
Step 4: Shape the Dough
- Lightly flour your work surface.
- Transfer the dough onto the surface.
- Fold the edges inward several times.
- Shape into a round loaf or oval loaf.
Avoid overworking the dough.
Step 5: Second Rise
- Place the shaped dough on a baking tray.
- Cover loosely.
- Allow to rise for another 30–40 minutes.
Step 6: Prepare for Baking
- Preheat oven to 220°C (425°F).
- Make a few shallow cuts on top with a sharp knife.
- Brush lightly with water if desired.
- Sprinkle with seeds or oats.
Baking Instructions
- Place bread in the preheated oven.
- Bake for 30–35 minutes.
- The crust should become golden brown.
- Tap the bottom of the loaf; it should sound hollow.
- Remove from oven and cool completely.
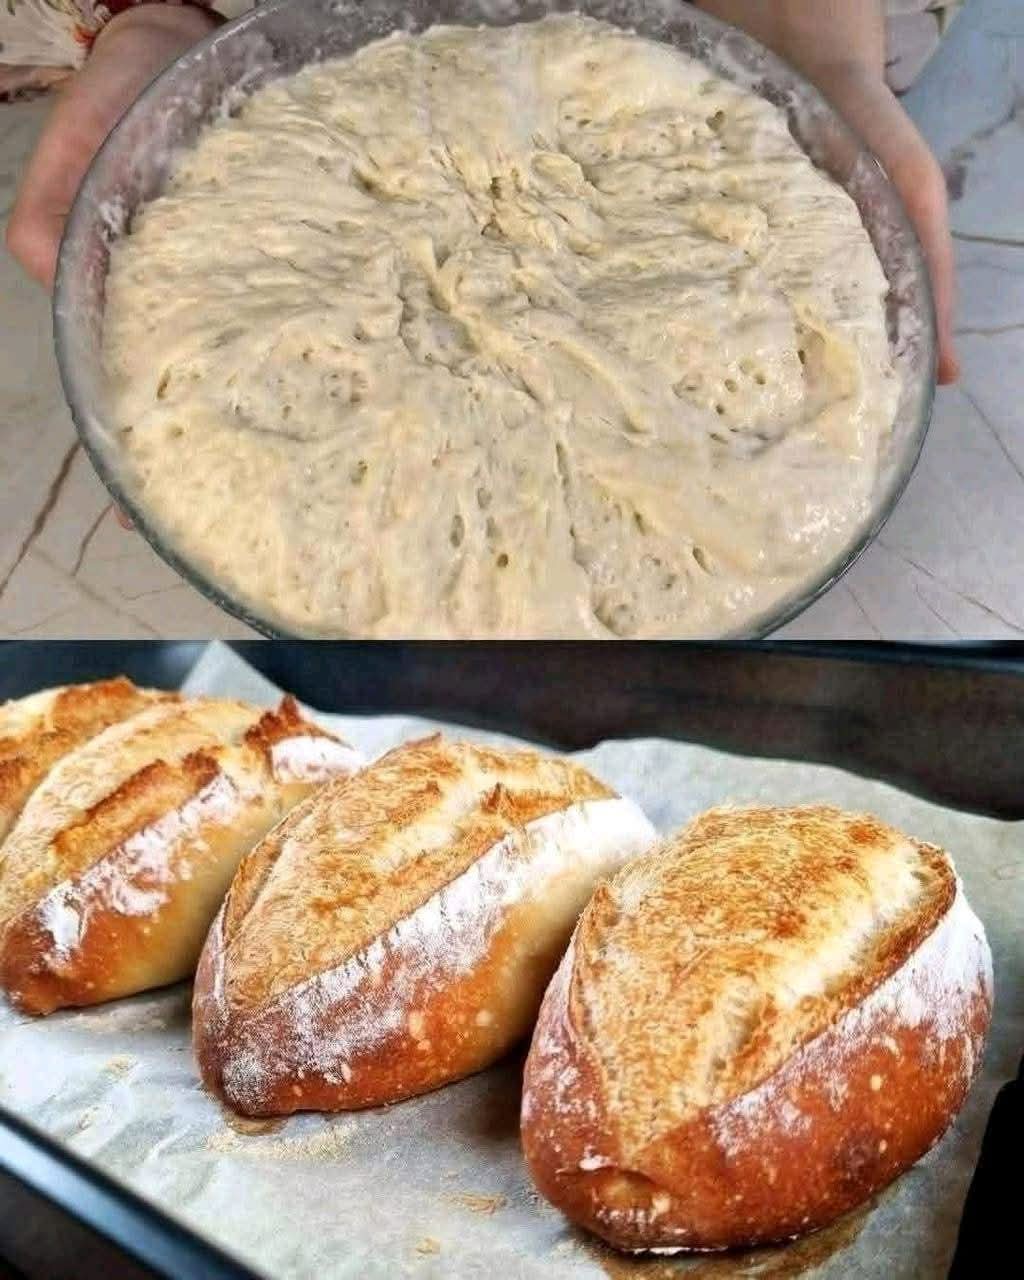
Formation and Texture
A perfect loaf should have:
Exterior
- Golden-brown crust
- Slight crispness
- Attractive artisan appearance
Interior
- Soft crumb
- Light and airy texture
- Even distribution of air pockets
- Moist and tender center
The long fermentation creates natural gluten development, resulting in excellent structure without kneading.
Alternative Methods
Dutch Oven Method
- Preheat a Dutch oven.
- Place dough inside carefully.
- Cover and bake for 30 minutes.
- Remove lid and bake 10–15 minutes more.
This method creates an extra crispy crust.
Overnight Fermentation
- Mix ingredients at night.
- Refrigerate overnight.
- Shape and bake the next day.
This develops a deeper flavor.
Whole Wheat Version
Replace half of the white flour with whole wheat flour for a nuttier taste and additional fiber.
Why Bread Lovers Adore This Recipe
Homemade Bread Lovers
- Fresh from the oven
- Incredible aroma
- Better than many store-bought loaves
Beginner Bakers
- No kneading required
- Simple ingredients
- Easy process
Artisan Bread Lovers
- Rustic appearance
- Crispy crust
- Soft interior
Family Meal Lovers
- Perfect for breakfast
- Great for sandwiches
- Delicious with soups and stews
Serving Suggestions
Serve warm with:
- Butter
- Honey
- Jam
- Olive oil
- Cheese
- Soup
- Stew
- Sandwich fillings
Nutritional Benefits
- Provides carbohydrates for energy
- Contains protein from flour
- Low in fat
- Can be enriched with whole grains
- Supports a balanced diet when enjoyed in moderation
Tips for Success
- Use fresh yeast.
- Do not use hot water.
- Allow enough rising time.
- Avoid adding too much extra flour.
- Let the bread cool before slicing.
Conclusion
This Perfect No-Knead Bread Recipe proves that making delicious homemade bread does not require special skills or hours of kneading. With just a few basic ingredients, you can create a beautiful loaf featuring a crispy golden crust and a soft, fluffy interior. Loved by bread enthusiasts around the world, this recipe is simple, reliable, and perfect for everyday baking. Once you experience the taste and aroma of freshly baked homemade bread, it may become a permanent favorite in your kitchen. 🍞✨❤️