Introduction
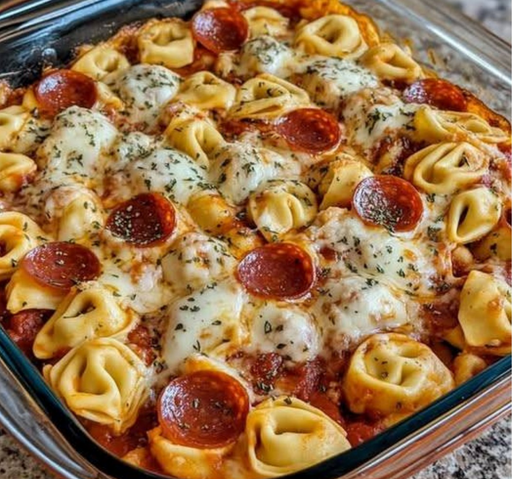
This Cheese Tortellini Pepperoni Pizza Casserole combines the best of two beloved dishes—creamy cheese tortellini and classic pepperoni pizza—into one irresistible baked pasta dish. Perfect for busy weeknights, potlucks, or family gatherings, this recipe is easy to prepare, packed with flavor, and guaranteed to be a crowd-pleaser. With layers of tender tortellini, rich pizza sauce, gooey melted cheese, and crispy pepperoni, every bite delivers comfort and satisfaction.
Recipe: Cheese Tortellini Pepperoni Pizza Casserole
Ingredients
- 1 lb (16 oz) cheese tortellini (fresh or frozen)
- 24 oz (3 cups) pizza sauce (jarred or homemade)
- 1.5 cups sliced pepperoni (divided)
- 2.5 cups shredded mozzarella cheese (divided)
- 1 cup shredded Italian cheese blend (or provolone, Parmesan, or Asiago)
- 1 tsp Italian seasoning (optional)
- ½ tsp garlic powder (optional)
- ¼ tsp red pepper flakes (optional, for heat)
- Fresh basil or parsley (for garnish, optional)
Tips for Success
- Avoid Overcooking Tortellini – Slightly undercook them since they’ll soften further while baking.
- Use High-Quality Sauce – A flavorful pizza or marinara sauce makes a big difference.
- Layer Cheese Properly – Mix some cheese into the tortellini and reserve some for the top to ensure gooey, melty layers.
- Customize Toppings – Add cooked sausage, mushrooms, olives, or bell peppers for extra flavor.
- Let It Rest – Allowing the casserole to sit for 5 minutes helps it hold together when serving.
Frequently Asked Questions (FAQs)
1. Can I make this ahead of time?
- Yes! Assemble the casserole (without baking), cover tightly, and refrigerate for up to 24 hours. Bake as directed, adding 5-10 extra minutes if cold.
2. Can I freeze this dish?
- Yes. Freeze before or after baking:
- Unbaked: Wrap tightly and freeze for up to 3 months. Bake from frozen, adding 15-20 minutes to cooking time.
- Baked: Cool completely, then freeze in portions. Reheat in the oven or microwave.
3. Can I use a different pasta?
- Yes. Substitute with cheese ravioli, penne, or rotini, adjusting cooking time as needed.
4. How do I prevent the casserole from drying out?
- Cover with foil for the first 15 minutes of baking, then uncover to melt the cheese.
5. What can I serve with this casserole?
- Pair with garlic bread, a fresh salad, or roasted vegetables for a complete meal.
Instructions
1. Preheat Oven & Prepare Baking Dish
- Preheat oven to 375°F (190°C).
- Lightly grease a 9×13-inch baking dish with non-stick spray or butter.
2. Cook the Tortellini
- Bring a large pot of salted water to a boil.
- Cook tortellini according to package instructions, but reduce cooking time by 1-2 minutes (they will finish cooking in the oven).
- Drain well but do not rinse—the starch helps the sauce cling to the pasta.
3. Mix Ingredients
- In a large bowl, combine the cooked tortellini, pizza sauce, 1 cup pepperoni, 1.5 cups mozzarella, Italian seasoning, garlic powder, and red pepper flakes. Stir until evenly coated.
4. Assemble the Casserole
- Transfer the tortellini mixture to the prepared baking dish, spreading it evenly.
- Top with the remaining mozzarella, Italian cheese blend, and reserved ½ cup pepperoni.
- For extra crispiness, sprinkle 2 tbsp grated Parmesan on top.
5. Bake
- Bake for 20-25 minutes, or until the cheese is bubbly and lightly browned.
- For a crispier top, broil for the last 2 minutes (watch closely to prevent burning).
6. Rest & Serve
- Let the casserole cool for 5 minutes before serving.
- Garnish with fresh basil or parsley if desired.
Conclusion
This Cheese Tortellini Pepperoni Pizza Casserole is a delicious, family-friendly dish that brings together the best of pasta and pizza in one hearty bake. Easy to customize and perfect for meal prep, it’s a guaranteed hit for any occasion. Whether you’re serving it for dinner, a potluck, or game day, this casserole will disappear fast!
Enjoy your meal! If you try this recipe, share your results—we’d love to hear how it turned out!