Introduction
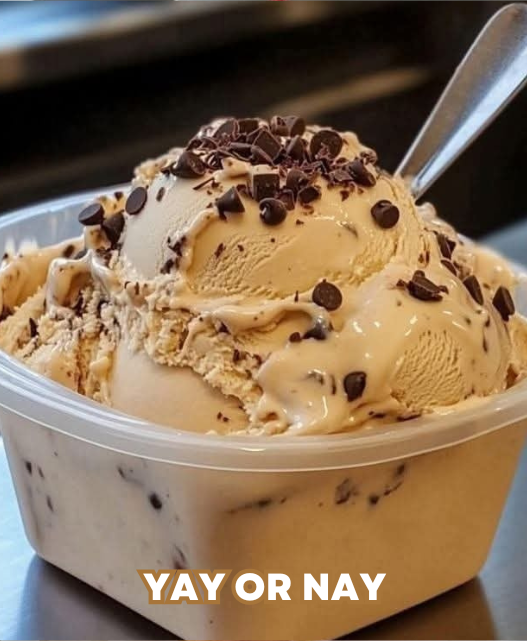
There’s nothing quite like the rich, creamy taste of homemade coffee ice cream—especially when it requires no special equipment or complicated techniques. This recipe delivers smooth, velvety ice cream with bold coffee flavor, perfect for hot summer days or as an elegant dessert.
Unlike store-bought versions, you control the coffee intensity, sweetness, and add-ins. Whether you prefer a mild mocha or an extra-strong espresso kick, this no-churn method ensures perfect results every time. Plus, with just 5 basic ingredients and 10 minutes of active prep, you’ll have a freezer full of coffee bliss.
Ingredients & Why They Work
The Essential Base:
- 2 cups (480ml) heavy cream (cold) – The high fat content creates a luxuriously creamy texture without iciness. Tip: Chill your bowl and beaters for best results.
- 1 (14oz) can sweetened condensed milk – Sweetens perfectly while keeping the ice cream scoopable.
- ¼ cup instant espresso powder – Dissolves smoothly for even coffee flavor. Substitute: 3 tbsp finely ground coffee (see Pro Tips).
- 1 tsp vanilla extract – Enhances the coffee’s depth.
- Pinch of salt – Balances sweetness and brightens flavors.
Optional Boosters:
- ½ cup chocolate chips or chunks – For a mocha twist.
- 2 tbsp coffee liqueur (e.g., Kahlúa) – Adds complexity and prevents over-hardening.
- 1 tsp cinnamon or cocoa powder – Warm spice pairing.
Step-by-Step Instruction
1. Infuse the Coffee Flavor (2 mins)
- In a small bowl, mix espresso powder with 1 tbsp hot water to form a smooth paste. Skip this step if using ground coffee.
- Whisk the paste into the sweetened condensed milk until fully dissolved.
2. Whip to Perfection (5 mins)
- Using a chilled metal bowl and beaters, whip the cold heavy cream to stiff peaks (when the beaters leave firm trails).
- Gently fold in the coffee-infused condensed milk and vanilla with a spatula. Key: Fold, don’t stir, to maintain airiness.
3. Customize & Freeze (5 mins + 6 hrs)
- Pour into a parchment-lined loaf pan or airtight container.
- For mix-ins:
- Swirl in chocolate chips or a ribbon of fudge sauce.
- Sprinkle with crushed espresso beans for crunch.
- Freeze at least 6 hours (overnight ideal).
4. Serve Like a Pro
- Let sit at room temp for 5-10 mins for easy scooping.
- Garnish with:
- Shaved chocolate
- Caramel drizzle
- Whipped cream
Pro Tips for Ice Cream Mastery
Flavor Adjustments:
- Milder coffee taste? Reduce espresso to 2 tbsp.
- Bolder kick? Add 1 tbsp extra espresso powder.
- No instant coffee? Steep 2 tbsp fine-ground coffee in ½ cup warm cream for 30 mins, strain, then chill before whipping.
Texture Secrets:
- Creamier consistency: Replace ¼ cup cream with full-fat coconut milk.
- No crystals: Stir once after 2 hours of freezing.
- Softer scoop: Add 1 tbsp vodka (alcohol lowers freezing point).
Storage & Serving:
- Keep airtight for up to 2 weeks.
- For parties: Pre-scoop onto a parchment-lined tray and refreeze.
Why This Recipe Works
- Science of No-Churn: The whipped cream traps air, mimicking churned ice cream’s lightness.
- Sweetened Condensed Milk prevents iciness by inhibiting large crystal formation.
- Espresso Powder delivers pure coffee flavor without bitterness or graininess.
“Tastes like a frozen latte crossed with whipped cream dreams!”
Conclusion
This Coffee Ice Cream is a game-changer for dessert lovers—decadent yet simple, customizable, and free of preservatives. Whether you’re serving it as:
- An after-dinner treat with biscotti
- A weekend indulgence with warm brownies
- An affogato (pour hot espresso over a scoop!)
…it’s guaranteed to impress.
Final Tip: Double the batch and layer it in jars with cookie crumbles for instant parfaits!
“Smooth, caffeinated, and utterly addictive—you’ll never buy store-bought again.” ☕❄️
Happy scooping!
