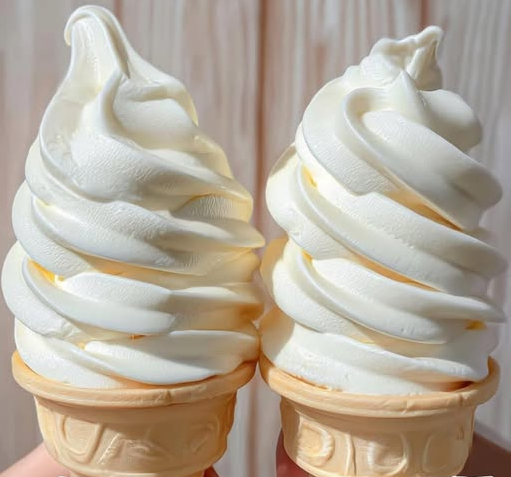
Introduction: Why Homemade Vanilla Ice Cream Reigns Supreme
There’s something magical about homemade vanilla ice cream – the rich, pure flavor that puts store-bought versions to shame, the velvety texture that melts luxuriously on your tongue, and the satisfaction of creating something truly special from scratch. This classic recipe delivers professional-quality results with just 5 simple ingredients and no eggs, making it both accessible and extraordinary.
What sets this recipe apart:
- Foolproof method perfect for first-time ice cream makers
- Versatile base for endless flavor variations
- No artificial stabilizers – just pure, wholesome ingredients
- Creamier texture than most commercial brands
Whether you’re an ice cream aficionado or a beginner in the kitchen, this guide will walk you through every step to create the perfect vanilla ice cream at home, complete with pro tips, science-backed techniques, and serving inspiration.
Ingredients: The Science Behind the Creaminess
Essential Components:
- 2 cups heavy cream (cold) – The high fat content (36-40%) creates that luxurious mouthfeel and prevents ice crystals
- 1 cup whole milk (cold) – Provides the perfect balance of richness and scoopability
- ¾ cup granulated sugar – Sweetens while lowering the freezing point for softer texture
- 1 tbsp pure vanilla extract – Or 1 vanilla bean (seeds scraped) for premium flavor
- Pinch of salt – Enhances all flavors and balances sweetness
Why These Ratios Work:
The 2:1 cream-to-milk ratio creates the ideal fat content (about 16-18%) for creamy texture without being overly heavy. The sugar content (about 15% by weight) ensures proper freezing consistency.
Step-by-Step Instructions: Mastering the Method
1. Preparing the Base (10 minutes active time)
- Dissolve the sugar completely:
- In a large bowl, whisk together milk, sugar, and salt for 2-3 minutes until no sugar granules remain
- Tip: Warming the milk slightly (not boiling) helps dissolve sugar faster, but cool completely before proceeding
- Incorporate the cream and vanilla:
- Gently stir in cold heavy cream
- Add vanilla extract (or vanilla bean seeds + pod)
- For vanilla bean: Steep the empty pod in warm milk first, then remove before adding cream
- Taste and adjust:
- The base should taste slightly sweeter than desired final product (flavor dulls when frozen)
- Add a touch more vanilla if needed (up to 1½ tbsp total)
2. The Crucial Chill (4+ hours)
- Refrigerate the mixture at least 4 hours (overnight is ideal):
- Cools ingredients thoroughly for faster churning
- Allows flavors to meld and hydrate fully
- Tip: Place bowl in an ice bath to accelerate cooling if needed
3. Churning Process (20-25 minutes)
- Prep your ice cream maker:
- Ensure bowl is fully frozen (usually 24 hours in freezer)
- Assemble according to manufacturer’s instructions
- Churn to perfection:
- Pour cold base into running machine
- Churn until thickened (like soft-serve)
- In last 5 minutes, add any mix-ins:
- Crushed cookies
- Chocolate chips
- Fruit purees
- Watch for the perfect consistency:
- Should mound on spoon
- Will have slight “ribbon” effect when drizzled
4. Freezing to Set (4+ hours)
- Transfer to storage container:
- Use an airtight, freezer-safe container
- Press parchment paper directly on surface to prevent ice crystals
- Freeze until firm:
- Minimum 4 hours, preferably overnight
- For quickest setting: Place in coldest part of freezer
Pro Techniques for Ice Cream Excellence
Texture Perfection Secrets:
- Temperature Control: Keep everything cold – warm ingredients won’t churn properly
- Sugar Science: For softer scoop, replace 2 tbsp sugar with 1 tbsp corn syrup or vodka
- Fat Balance: For richer texture, substitute ½ cup milk with sweetened condensed milk
Flavor Variations:
☕ Coffee: Add 2 tbsp instant espresso powder to base
🍯 Honey Vanilla: Replace ¼ cup sugar with honey
🍫 Chocolate Ripple: Layer with homemade fudge sauce after churning
Troubleshooting Guide:
- Too hard: Add 1 tbsp vodka or increase sugar slightly next time
- Too soft: Decrease sugar by 2 tbsp or freeze longer
- Icy texture: Ensure proper churning time and use fresh ingredients
Serving & Storage: Maximizing Enjoyment
Presentation Ideas:
- Classic sundae with hot fudge and toasted nuts
- Elegant affogato (pour espresso over scoops)
- Sandwich between homemade cookies
- Garnish with edible flowers for special occasions
Storage Tips:
- Best consumed within 1 week for peak texture
- Freeze up to 1 month – may develop slight ice crystals over time
- Thaw 5-10 minutes at room temp for ideal scooping
Conclusion: The Joy of Homemade Ice Cream
This homemade vanilla ice cream recipe represents more than just a delicious dessert – it’s a celebration of craftsmanship in your own kitchen. By understanding the simple science behind ice cream making and using quality ingredients, you can create frozen treats that surpass anything from the grocery store freezer aisle.
Why this recipe will become your staple:
- Consistent results every time
- Endless customization options
- Impressive yet approachable for any skill level
- Pure, recognizable ingredients you can feel good about
Final Chef’s Secret: For professional-level presentation, use an ice cream scoop dipped in hot water between servings to create perfect round scoops every time.
“Once you taste this rich, creamy vanilla ice cream made with your own hands, you’ll never settle for store-bought again.” 🍨✨
Now go forth and churn with confidence! Your perfect scoop awaits.
