Introduction
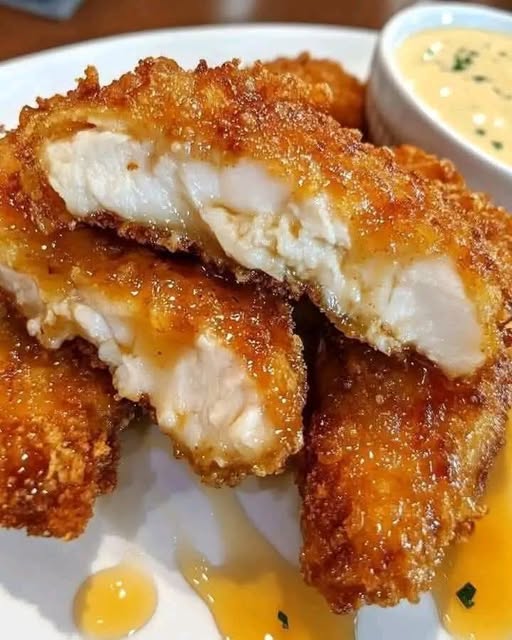
In today’s fast-paced world, we all crave meals that are quick, delicious, and satisfying without compromising on flavor or health. These Air Fryer Honey Butter Garlic Chicken Tenders check all the boxes—they’re crispy on the outside, juicy on the inside, and coated in an irresistible sweet-savory glaze that will have everyone asking for seconds.
What makes this recipe stand out?
✔ Healthier than deep-fried – The air fryer delivers that perfect golden crunch with just a fraction of the oil
✔ Ready in 15 minutes – Faster than takeout, perfect for busy weeknights
✔ Family-friendly – Kids and adults alike will love the balanced honey-garlic flavor
✔ Meal-prep superstar – Stays crispy when reheated, great for lunches
Whether you’re looking for a quick dinner solution, game-day snack, or meal-prep staple, these tenders deliver restaurant-quality taste with minimal effort. Let’s dive into how to make them perfectly every time!
Ingredients & Why They Work
For the Chicken Tenders:
- 1 lb chicken tenders – The perfect cut for even cooking (or slice chicken breasts into strips)
- 1 egg + 1 tbsp water – Creates a sticky base for the coating to adhere
- 1 cup panko breadcrumbs – Gives maximum crispiness (or almond flour for gluten-free)
- ½ tsp garlic powder, ½ tsp paprika – Adds depth to the breading
- ½ tsp salt, ¼ tsp black pepper – Essential seasoning
For the Honey Butter Garlic Glaze:
- 3 tbsp butter – Rich, velvety base for the sauce
- 2 tbsp honey – Sweetness that caramelizes beautifully
- 3 garlic cloves, minced – Fresh garlic packs way more flavor than powder
- 1 tsp soy sauce – Adds umami depth (use coconut aminos for GF)
- ½ tsp red pepper flakes – Optional, but gives a nice subtle heat
Optional Garnishes:
- Fresh chopped parsley
- Sesame seeds
- Extra honey drizzle
Step-by-Step Instructions
1. Prep the Chicken
- Pat dry the tenders thoroughly with paper towels (this helps the coating stick better).
- Set up your breading station:
- Bowl #1: Whisk egg + water
- Bowl #2: Mix panko, garlic powder, paprika, salt & pepper
2. Bread the Tenders
- Dip each tender in the egg wash, letting excess drip off.
- Press into the panko mixture, coating all sides evenly.
- Place on a plate (pro tip: let them sit 5 mins so coating adheres better).
3. Air Fry to Perfection
- Preheat air fryer to 400°F (200°C) for 3 minutes (crispier results!).
- Arrange tenders in a single layer (work in batches if needed).
- Lightly spray with olive oil (this gives that golden crunch).
- Air fry for 8-10 minutes, flipping halfway, until internal temp reaches 165°F (74°C).
4. Make the Glaze
While chicken cooks:
- Melt butter in a small saucepan over medium heat.
- Add garlic and sauté 30 seconds until fragrant (don’t let it burn!).
- Stir in honey, soy sauce, and red pepper flakes. Simmer 1-2 minutes until slightly thickened.
5. Finish & Serve
- Toss cooked tenders in the glaze (or brush it on for lighter coating).
- Garnish with parsley and serve immediately.
Pro Tips for the Best Results
For Extra Crispiness:
- Use panko instead of regular breadcrumbs
- Preheat the air fryer before adding chicken
- Don’t overcrowd the basket—air needs to circulate
Flavor Variations:
🍯 Spicier: Add 1 tsp sriracha to the glaze
🍋 Zesty: Stir in 1 tsp lemon zest to the breading
🍁 Autumn twist: Use maple syrup instead of honey
Meal Prep & Storage:
- Fridge: Store cooked tenders (unglazed) for 3 days
- Freeze: Keep in airtight container for 1 month
- Reheat: Air fry at 375°F for 3-4 minutes to restore crispiness
Serving Suggestions
As a Main Dish:
- Over jasmine rice with steamed broccoli
- In wraps with slaw and ranch dressing
- With mashed potatoes and roasted carrots
As Appetizers/Snacks:
- Skewered with dip options (ranch, honey mustard, etc.)
- On a party platter with veggies and fries
Why This Recipe Work
- Air Frying Science: The rapid hot air circulation creates a crispy exterior while keeping the inside juicy—no dry chicken here!
- Flavor Balance: The glaze’s sweetness (honey), richness (butter), and savoriness (garlic/soy) complement each other perfectly.
- Texture Contrast: The crunchy panko coating against the tender chicken is irresistible.
“These taste like they came from a restaurant, but are so easy to make at home!”
Conclusion
These Honey Butter Garlic Chicken Tenders prove that quick meals don’t have to be boring. With their perfect crispiness, addictive glaze, and minimal cleanup (thank you, air fryer!), they’re destined to become a regular in your recipe rotation.
Perfect for:
- Busy parents needing a kid-approved dinner
- College students wanting something better than ramen
- Meal preppers looking for a protein that stays crispy
Final Tip: Double the glaze recipe—you’ll want extra for dipping!
“Once you try these, you’ll never go back to plain chicken tenders again.”
Enjoy your delicious creation! 🍯🍗