Introduction: A South African Classic with a Chocolate Twist
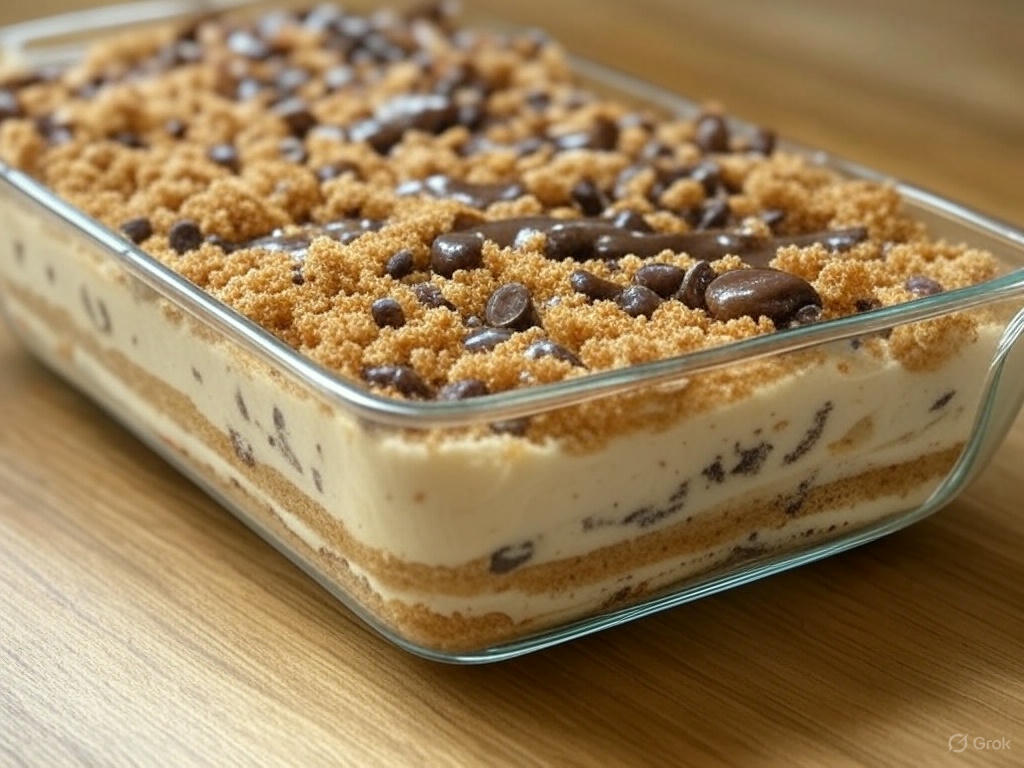
Few desserts capture the essence of simplicity and indulgence quite like the Crunchie Crumble Tart, also known as Crunchie Krummeltart. This beloved South African no-bake fridge tart combines layers of creamy caramel, finely crushed Tennis biscuits, and chunks of Crunchie chocolate for a dessert that is as easy to make as it is irresistible. Perfect for hot summer days, last-minute gatherings, or whenever a sweet craving strikes, this tart requires no oven time—just a bit of patience while it sets in the fridge.
The beauty of this dessert lies in its contrast of textures: the smooth, velvety caramel filling, the crumbly biscuit base, and the satisfying crunch of honeycomb chocolate. Whether you’re a fan of traditional milk tart or looking for a new crowd-pleaser, this recipe delivers a perfect balance of sweetness and texture.
Ingredients: Minimal Effort, Maximum Flavor
For the Tart Base & Layers
- 500 ml (2 cups) chilled cream (whipped to stiff peaks)
- 1 tin (360 g) caramel condensed milk (or homemade dulce de leche)
- 2 packets (200 g each) Tennis biscuits, finely crushed (or substitute with graham crackers or digestive biscuits)
- 4 Crunchie chocolates, roughly chopped (or Peppermint Crisp for a minty variation)
Step-by-Step Instructions
1. Prepare the Cream and Caramel Filling
- In a large mixing bowl, whip the chilled cream until stiff peaks form.
- Gently fold in the caramel condensed milk until fully combined, creating a smooth, creamy mixture.
2. Layer the Biscuit Crumbs
- In a rectangular or square dish (approximately 20×20 cm), spread half of the finely crushed Tennis biscuits evenly across the bottom, pressing lightly to form a firm base.
3. Add the Creamy Caramel Layer
- Pour half of the caramel cream mixture over the biscuit layer, spreading it evenly with a spatula.
4. Incorporate the Crunchie Chocolate
- Sprinkle half of the chopped Crunchie chocolates over the caramel cream layer.
5. Repeat the Layers
- Add the remaining crushed biscuits as the next layer, followed by the rest of the caramel cream.
- Finish by scattering the remaining Crunchie chunks on top for a final crunch.
6. Chill to Set
- Cover the dish with plastic wrap and refrigerate for at least 4 hours, preferably overnight, to allow the layers to firm up.
7. Serve and Enjoy
- Once set, slice into squares and serve chilled. The tart can be garnished with extra biscuit crumbs or a drizzle of melted chocolate if desired.
Why This Recipe Stands Out
- No-Bake Convenience – Ideal for warm weather or when oven space is limited.
- Textural Harmony – Creamy, crumbly, and crunchy in every bite.
- Customizable – Swap Crunchie for Peppermint Crisp, or add nuts for extra texture.
- Crowd-Pleasing – A guaranteed hit at parties, braais, or family dinners.
Pro Tips for the Best Results
- Use well-chilled cream – This ensures a stable whipped consistency.
- Press the biscuit base firmly – Prevents crumbling when slicing.
- Adjust sweetness – If preferred, reduce the caramel or use a lighter whipped topping.
- Experiment with layers – Add a chocolate ganache drizzle between biscuit layers for extra decadence.
Serving and Storage Suggestions
- Serve cold – The tart holds its shape best when chilled.
- Store covered in the refrigerator for up to 3 days.
- Freezing not recommended – The creamy layers may separate upon thawing.
Conclusion: A Must-Try Treat for Any Occasion
The Crunchie Crumble Tart is more than just a dessert—it’s a celebration of effortless elegance and nostalgic flavors. With its no-fuss preparation and irresistible layers, it’s a recipe that invites creativity while delivering consistent deliciousness. Whether you’re a seasoned baker or a beginner, this tart promises to impress with minimal effort and maximum reward.
So, the next time you need a dessert that’s both simple and spectacular, let this Crunchie Krummeltart take center stage. One bite, and it’s sure to become a staple in your recipe collection.
Happy indulging!
